
SOLIS can add fidelity to mission models by providing realistic satellite attitude profiles and maneuvers. With SOLIS, it is possible to model camera and antenna pointing and slews between ground targets, planes and other satellites. When SOLIS runs in STK, all of its behaviors are running on fully functional flight software, which is fed simulated sensor data and outputs simulated actuator commands, with SOLIS's Onboard Dynamic Simulation System (ODySSy) being used to close the loop between actuator behavior and sensor input. To learn more about SOLIS on ASI's website, click here.
In order to accurately point, MAX - the flight software running inside SOLIS - must have an accurate understanding of its own position. This is a challenge discussed in our SOLIS Ephemeris Management article. In real-world operation, MAX must propagate its own orbit to understand its position in space. MAX can define four different types of targets, with the Ballistic target type making it possible to model and track the relative position between two orbiting satellites.
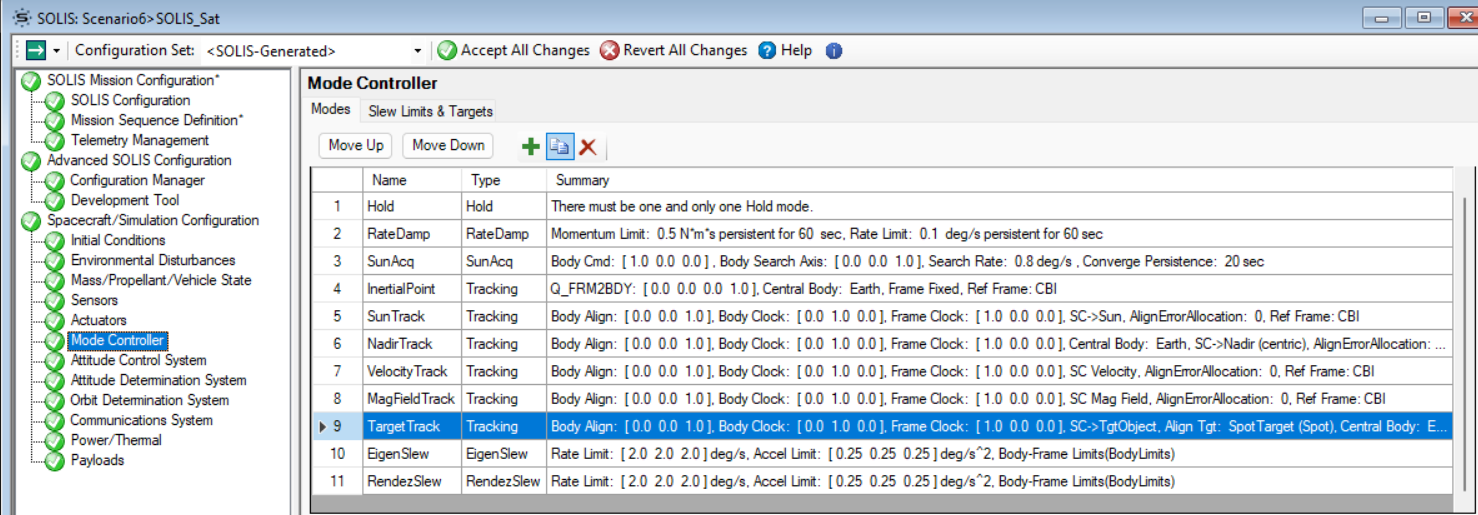
The Slew Limits & Targets subtab of the Mode Controller page of SOLIS is used to define targets. Modes are then used to define the target type and the pointing/alignment vector. For example, the default TargetTrack mode (mode #9 on the Modes subtab) is configured to slew the satellite's [0, 0, 1] alignment vector to point in the direction of the SpotTarget target type.
The Target Types:
First, we will briefly discuss all four target definitions, then discuss how to use the Ballistic Target to point at another satellite. For more information on the target definitions, click here.
1: Spot Target
Used for stationary ground targets, this target definition uses a target's latitude, longitude and altitude on the central body the satellite is orbiting to generate a pointing vector from the satellite's position to the target position for slews. When the A Spot Target definition comes prebuilt in any SOLIS scenario for use in the Target Planner, a useful tool covered in the introductory SOLIS Tutorial.
2: Scan Path
Used for targeting swaths of the ground, this target definition is like the Spot, but allows the satellite to sweep from one point on the earth to another, rather than targeting a stationary point.
3: Scheduled Path
For targeting planes, ships and other earth-based moving objects, this target type allows the satellite to track a moving object on or above the surface of the earth.
4: Ballistic
To target other satellites that are moving relative to your own satellite, MAX uses the Ballistic target definition. To point at an orbiting satellite, MAX must predict its path by propagating its orbit. The Ballistic target definition takes the initial state, or ephemeris, of a target satellite and propagates it the same way it propagates its own orbit. MAX uses a relatively simple propagator, so for tracking over a long period of time, or for tracking a maneuvering target, this ephemeris may need to be updated with a new entry to maintain pointing accuracy. It is also possible to add ephemeris tables for these ballistic targets to ensure accurate tracking if the target satellite is maneuvering or being tracked over a long period of time.
How to Use the Ballistic Target Definition to Track a Satellite:
Note: This tutorial assumes a working knowledge of STK and will require an understanding of the STK GUI to follow along. New STK Users may consider taking the Level 1 STK Certification Training to familiarize themselves with STK. Please contact us at support@lsas-tec.com or create a support ticket at https://lsas-tec.freshdesk.com/support/tickets/new for questions or additional support.
Configuring Ballistic Targeting:
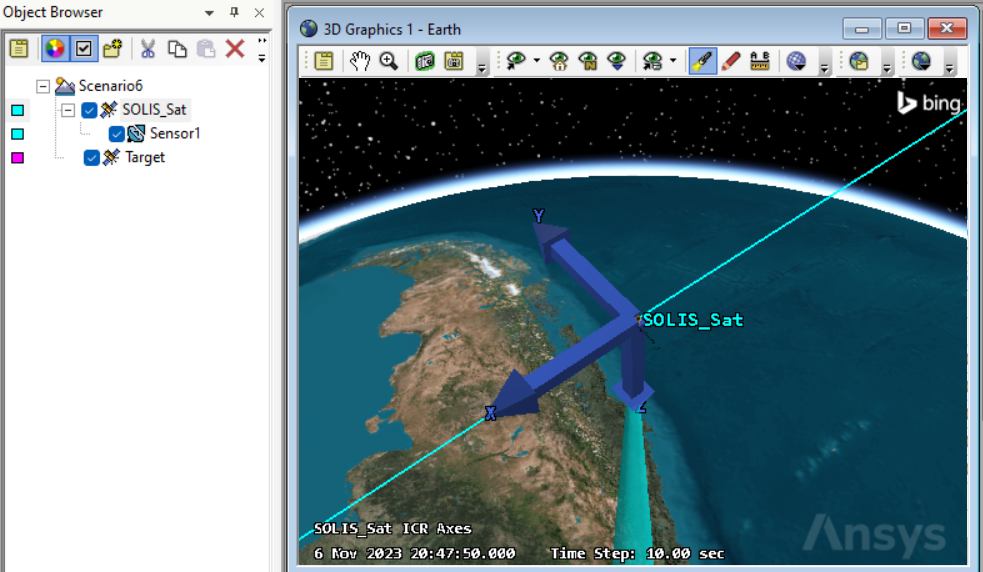
To illustrate ballistic tracking, we used the Insert STK Objects tool to create a satellite in STK and named it "Target." The orbital parameters of the target satellite are arbitrary; MAX can track any object that is orbiting the same central body as itself.
If your scenario does not already have a SOLIS-modeled satellite, one can be created now with the Insert STK Objects tool. For this tutorial, we use the SOLIS default configuration, adding a sensor object to the STK satellite object to demonstrate pointing. We used a default conic sensor, left the default sensor pointing in the +Z direction, and narrowed the cone half angle to two degrees.
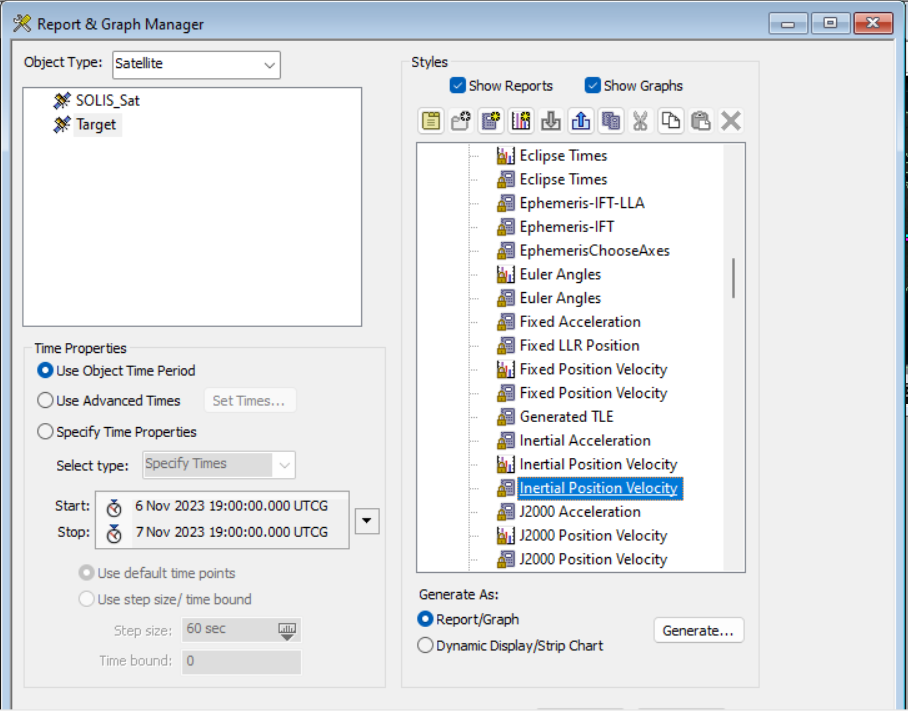
In order to propagate the orbit of the Target satellite, MAX will need to know the target's ephemeris in the CBI reference frame. For any STK satellite, this can be obtained with the report and graph manager. Right click the Target satellite in the object browser on the left and select the Report and Graph Manager. In the installed styles, select the "Inertial Position Velocity" report type.
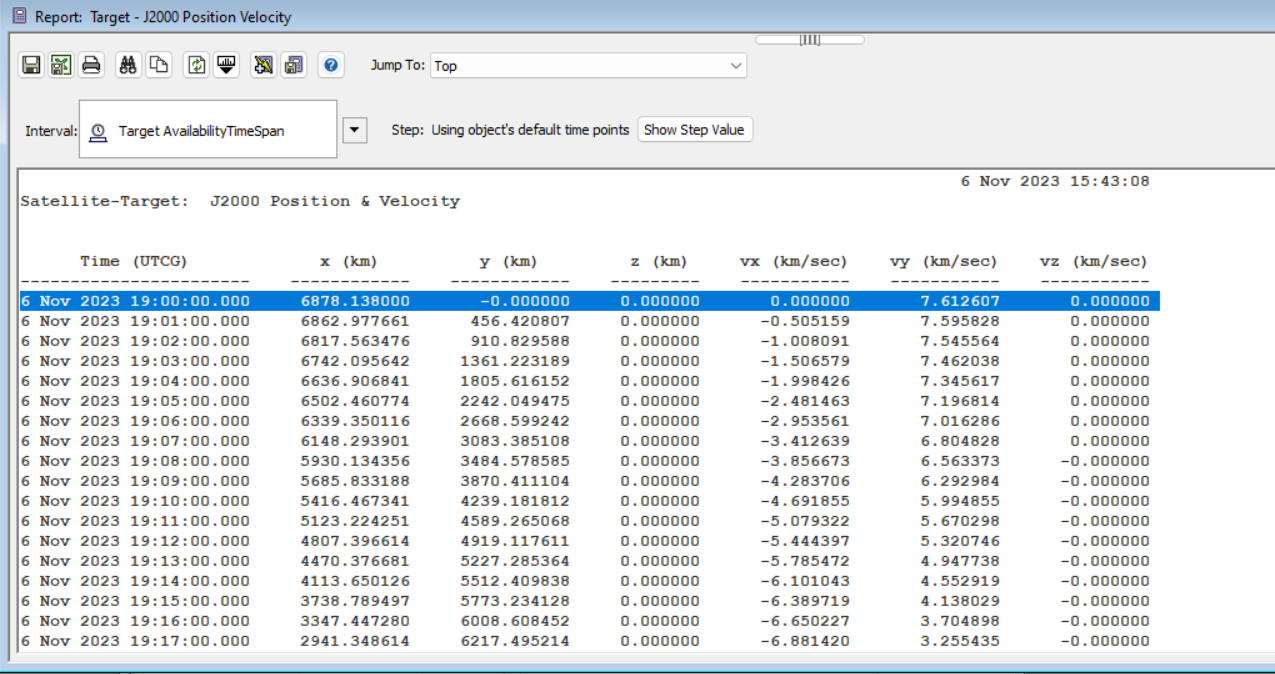
Generate the "Inertial Position Velocity" report. This report provides the position and velocity of the Target satellite in the CBI frame. For one of the data points, take note of the time value, the position values, and the velocity values. For longer SOLIS scenarios, or targets that are maneuvering, users can choose a point in time that is nearer to the time of target tracking. In this demonstration, we simply record the first data point.
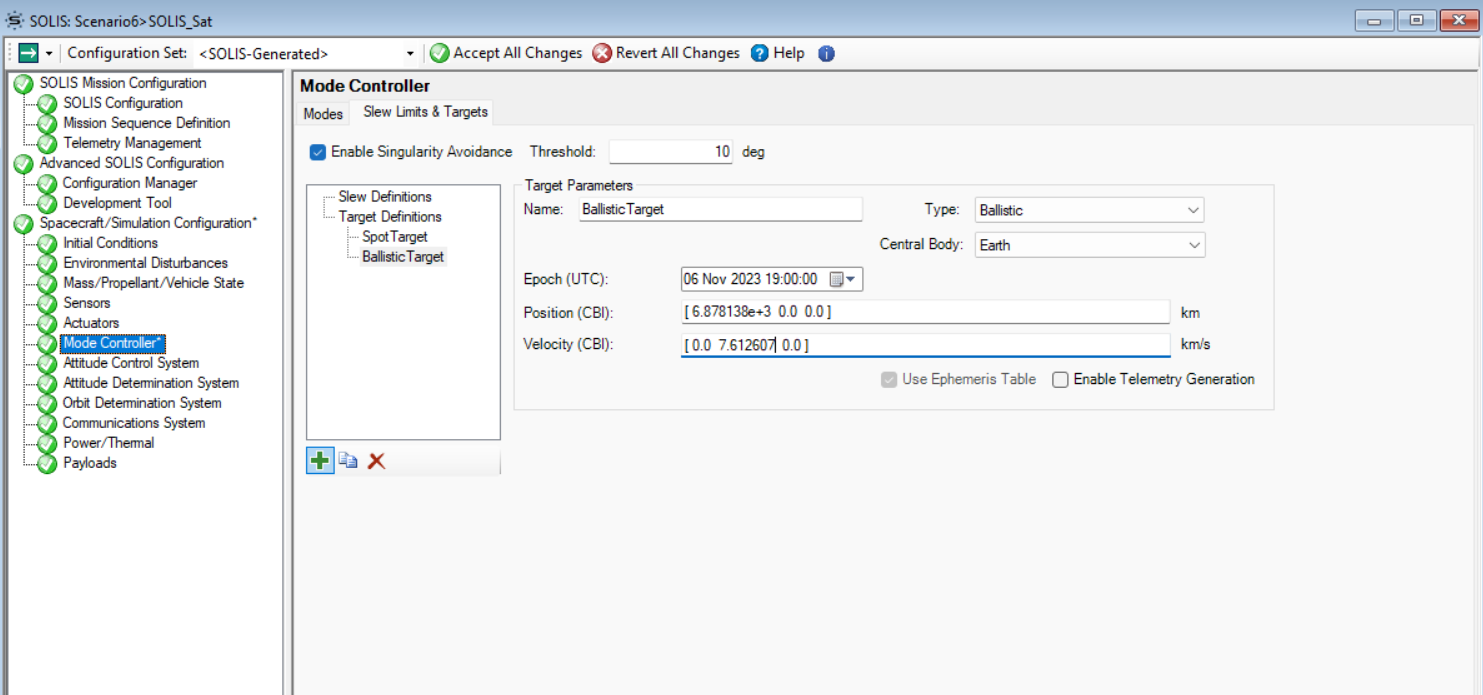
To open the SOLIS_Sat's SOLIS page, right click SOLIS_Sat in the object browser on the left and select SOLIS from the drop-down menu. Navigate to the Mode Controller page, then the Slew Limits & Targets page, and add a new ballistic target definition by clicking the green plus button below the slew and target definitions. This ballistic target will give MAX the Target satellite's initial state so that MAX can propagate the orbit and predict Target's position moving forward.
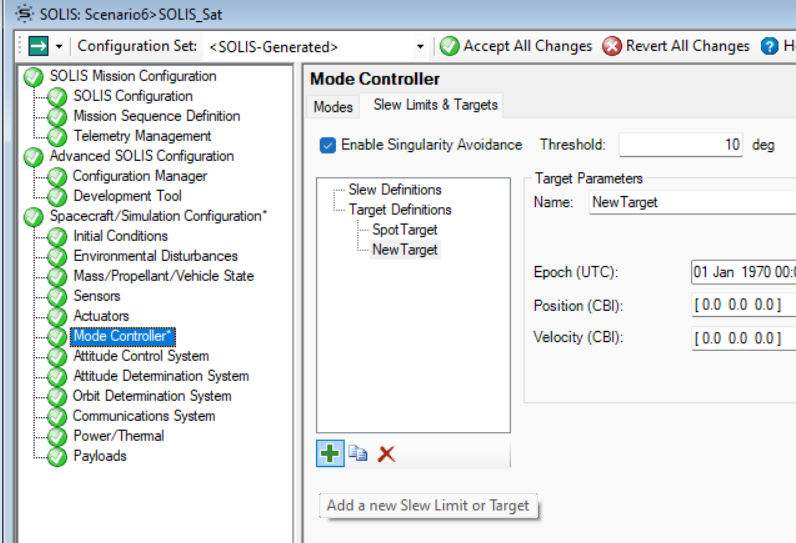
To configure the target definition to track the Target satellite, set the following values:
Name: BallisticTarget
Type: Ballistic
Epoch (UTC): The time noted from the Inertial Position Velocity report of the Target satellite.
Position (CBI): The position noted from the Inertial Position and Velocity report of the Target satellite.
Velocity (CBI): The velocity noted from the Inertial Position and Velocity report for the Target satellite.
Based on the Inertial Position Velocity report generated in our scenario, we had the following values:
Now that we have defined the target, we will define a targeting mode that references this ballistic target. For this demo we will copy the TargetTrack mode and modify it into a ballistic track. This mode was copied for convenience as its alignment vector is oriented in the same direction as the SOLIS satellite's camera. If your sensor points in a different direction, simply configure the Body Align: vector to the direction of the sensor. Select the TargetTrack mode and click the copy button at the top of the page.
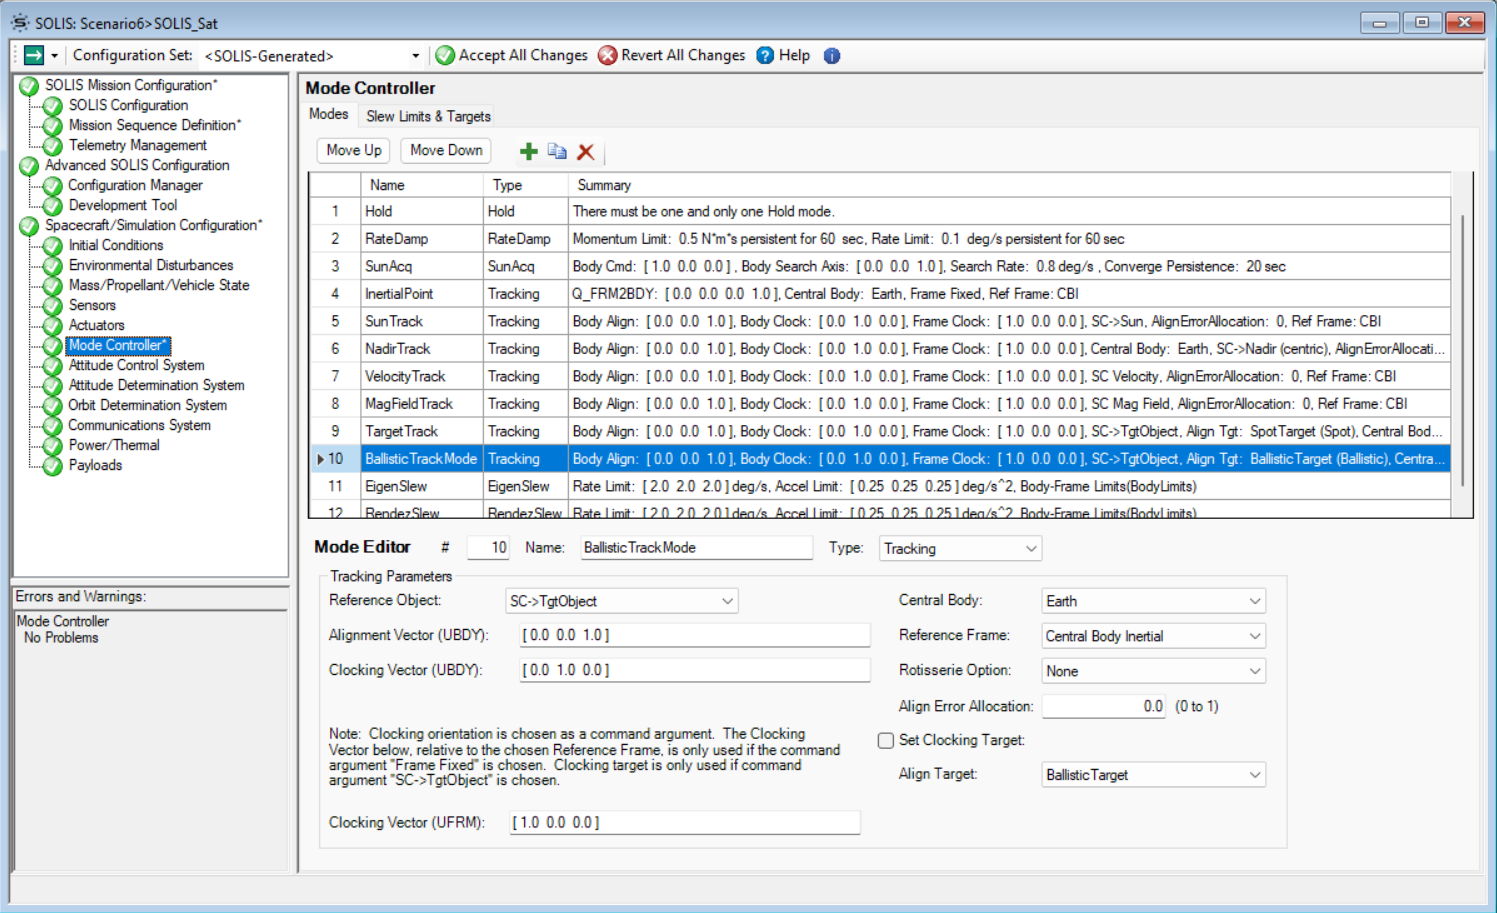
This will create a new mode called "TargetTrack_Copy". Rename this mode to "BallisticTrackMode", and then at the bottom, set Align Target: to "BallisticTarget." When activated, this mode will point the satellite's Body Align: vector toward the Target satellite.
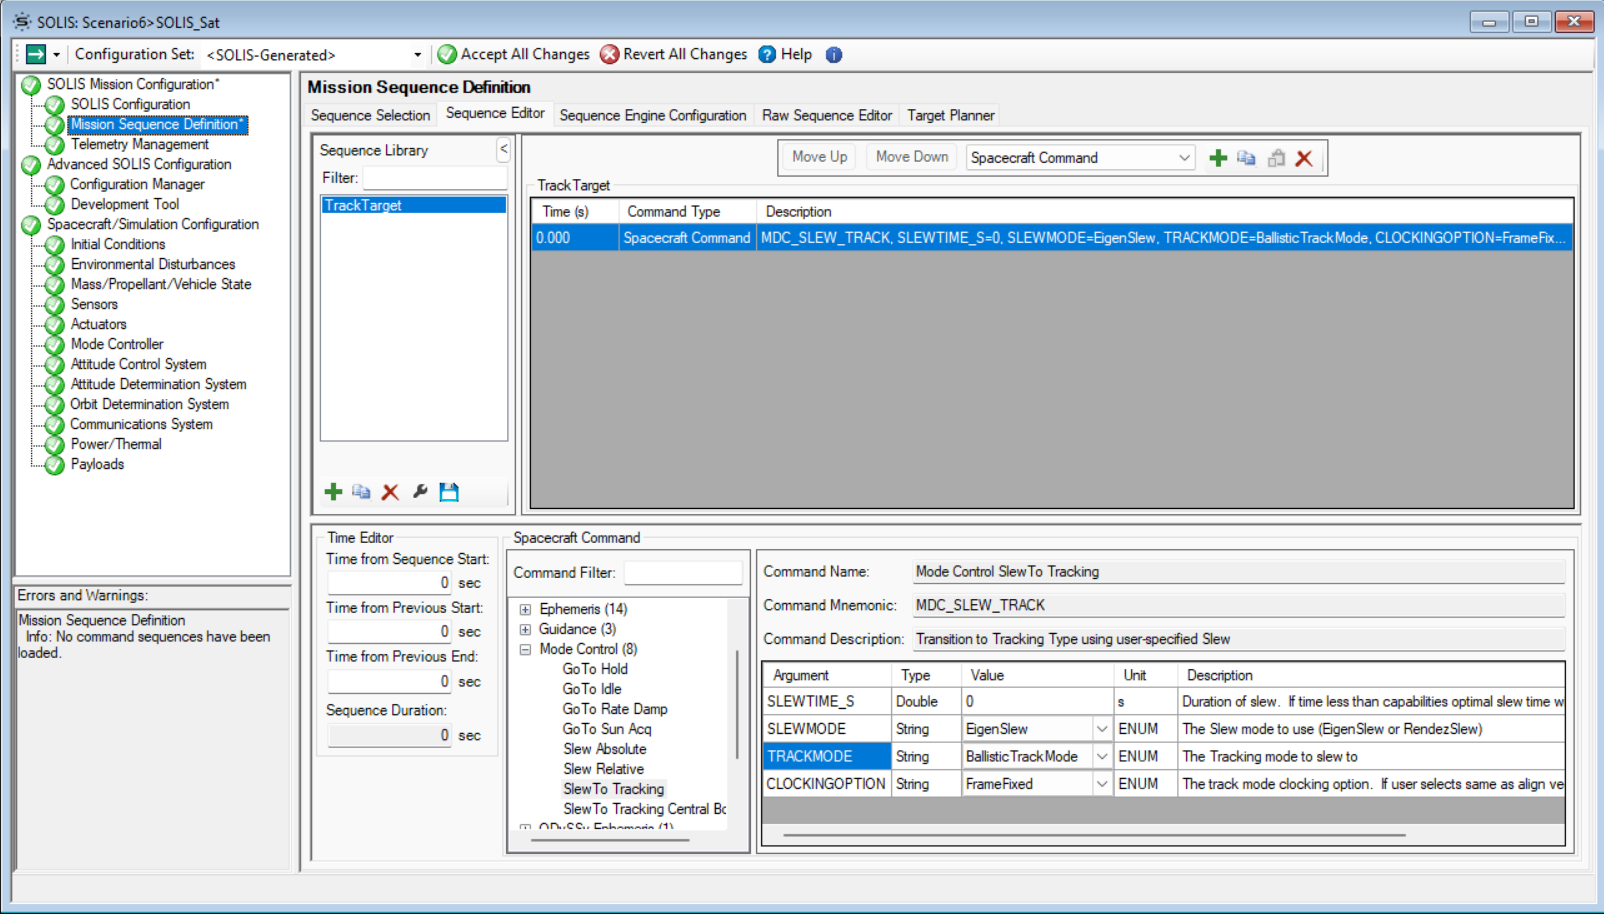
To demonstrate this new ballistic tracking mode, we will now go to the Mission Sequence Definition page, open the Sequence Editor and add a new target sequence by clicking the green plus button. Save this sequence with the name "TrackTarget."
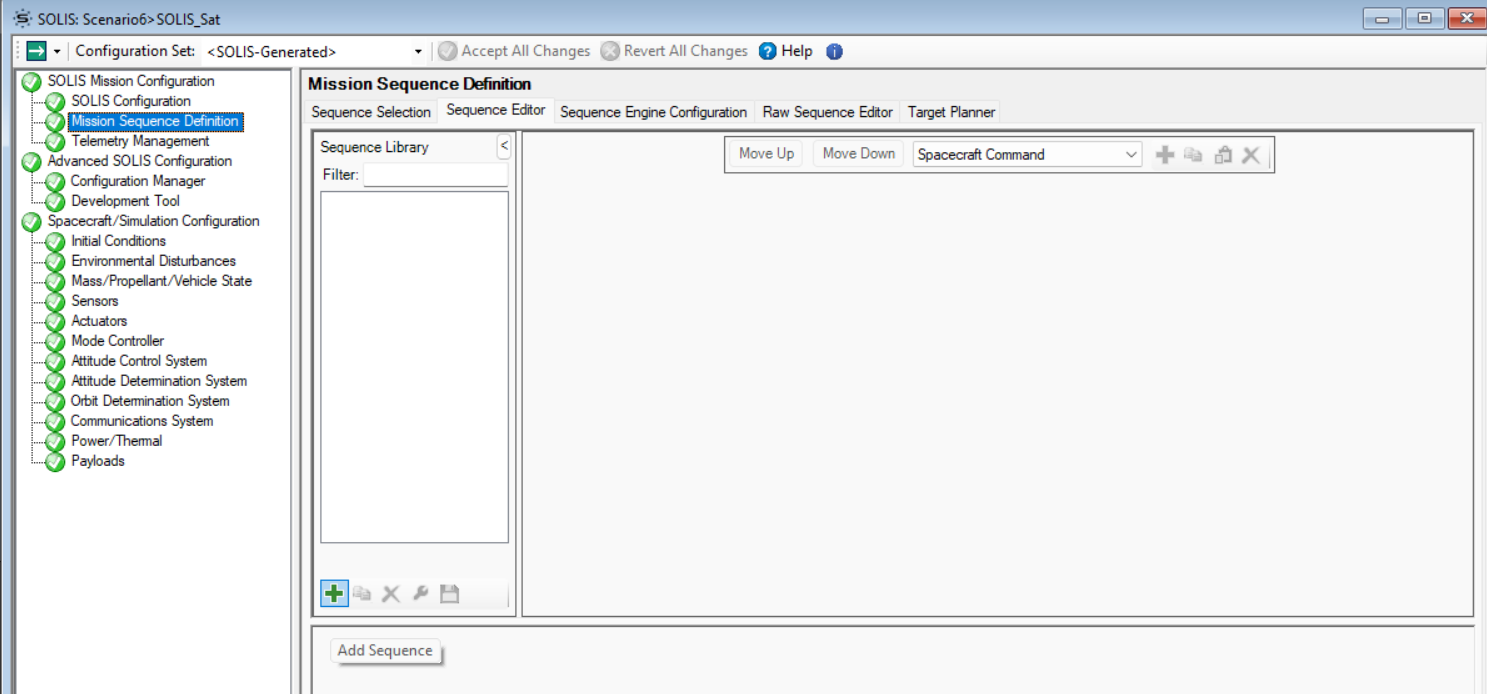
Next, click the green plus button near the top of the page next to Spacecraft Command and add a single command to the mission sequence: "SlewTo Tracking" (located in Mode Control). Change the TRACKMODE option to BallisticTrackMode - the mode created in the previous steps - and save the sequence.
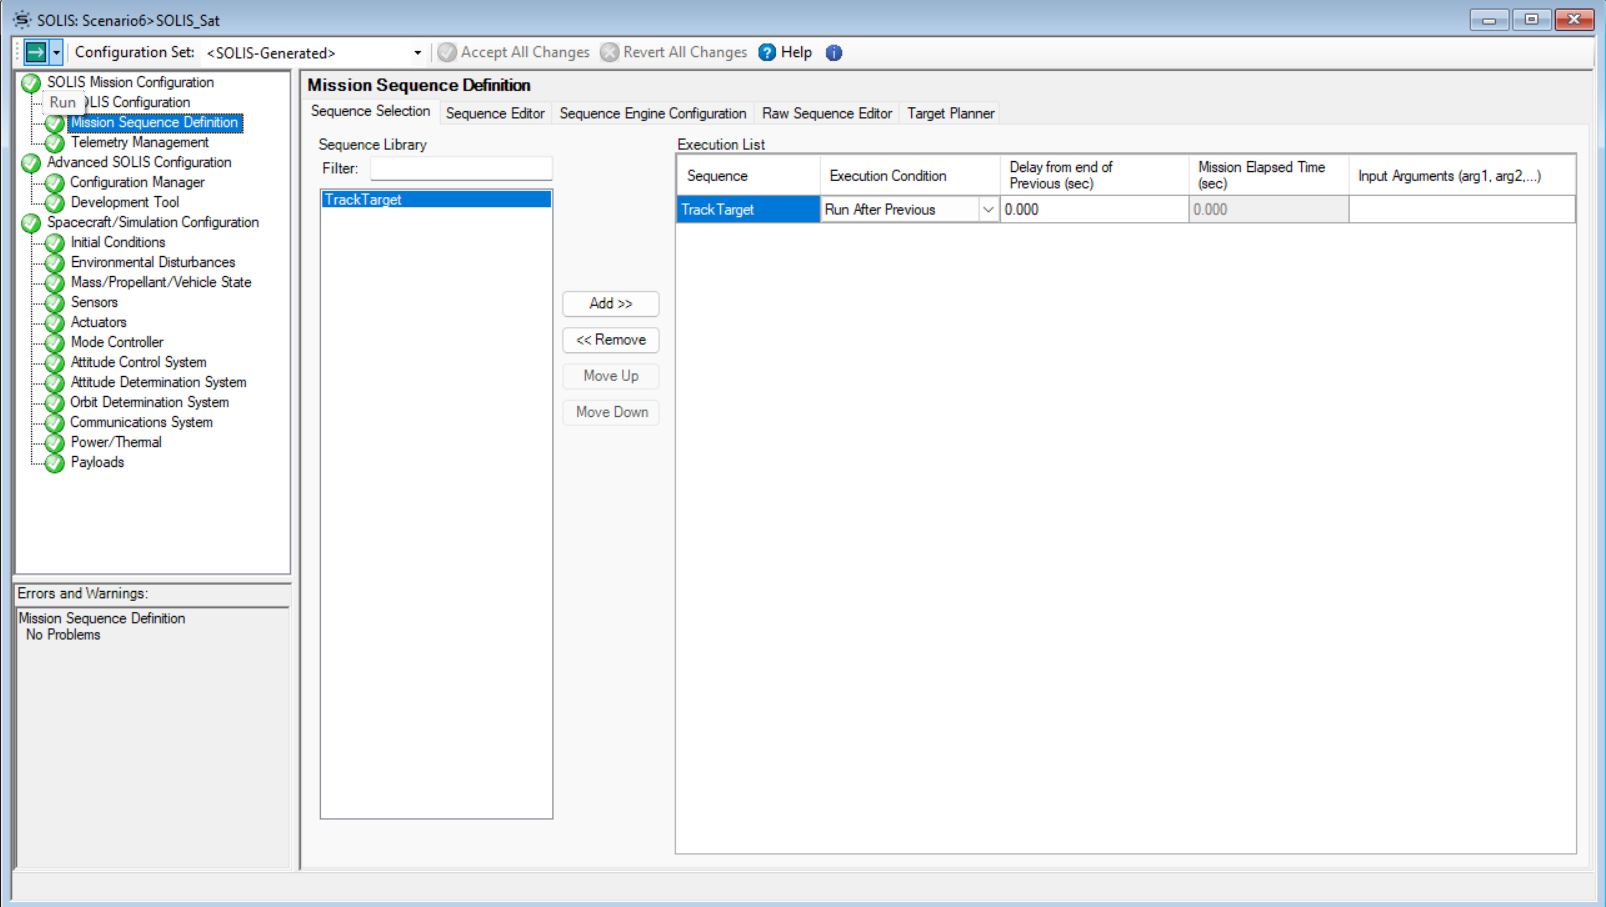
Last, test the ballistic tracking sequence! Go to the Sequence Selection subtab, select the TrackTarget sequence you just created, add it to the execution list, and click Accept All Changes at the top. Now, when SOLIS is run, MAX will run the sequence just created. Run the SOLIS scenario by clicking the green button at the top left.
When running SOLIS, users should see their satellite tracking the Target! You can add as many tracking targets as you would like by creating new modes, or updating the ephemeris to that of a different satellite while MAX is running via direct commanding (EPH_ADD_BALLISTICTGT_ENTRY). Note that for longer scenarios, the target's ephemeris may need to be updated to maintain accurate tracking.

You now know how to configure ballistic tracking in SOLIS! Ballistic tracking sequences can be used to simulate imaging of a target satellite, data downlink to a GEO relay satellite, or any other ballistic tracking in STK. In the Sequence Selection page, add and reorder as many sequences as desired to simulate a full satellite mission, slewing back and forth between communication relays, sun pointing, ground stations and more. There is a great deal of additional configuration and customization that can be done in SOLIS, and fully configuring the satellite in SOLIS will add fidelity to a mission model. We recommend following the SOLIS introductory tutorial available here, which provides a full walkthrough of satellite SOLIS configuration. Users can also explore the example SOLIS scenarios that come pre-built with the SOLIS install to see what kind of modeling is possible in SOLIS.
If you have any further questions or need assistance, we are here to help! Our dedicated Tec-Support team is ready to provide prompt and personalized assistance tailored to your needs. Please don't hesitate to reach out by submitting a ticket by going to https://lsas-tec.freshdesk.com/support/tickets/new. We look forward to assisting you and ensuring a positive experience.
Thanks,
LSAS Tec-Support Team
Was this article helpful?
That’s Great!
Thank you for your feedback
Sorry! We couldn't be helpful
Thank you for your feedback
Feedback sent
We appreciate your effort and will try to fix the article