
STK-Python API Integration-Basic Satellite
STK has a variety of tools that can be integrated for automation and streamlining mission planning processes. Python is one of these tools. This lesson will go over how to use Python to propagate a Satellite into STK and change some of its parameters. Before we begin, be sure to follow the API installation guide at STK : LSAS Tec (freshdesk.com) to properly set up the API and your scenario.
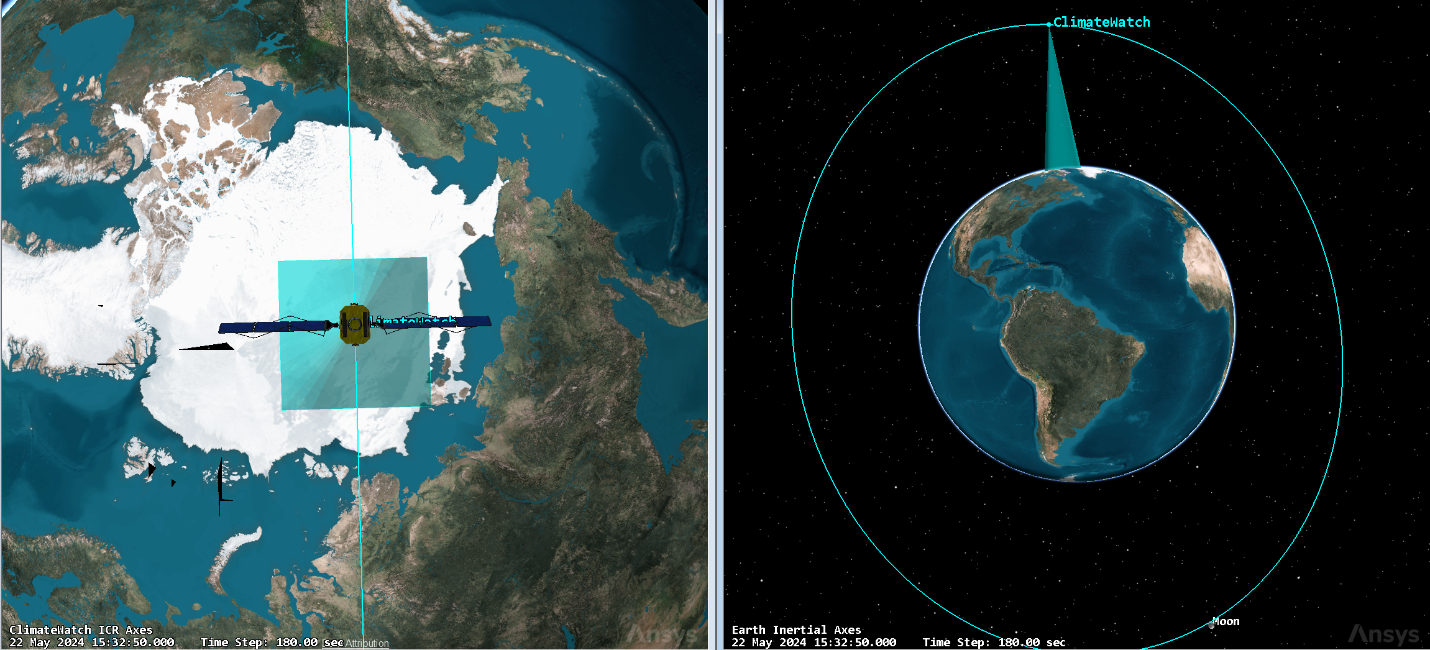
In this lesson, we will propagate a Satellite in a Sun-Synchronous orbit that will have the orbit path to allow an attached sensor to monitor the Earth’s Climate. These basics outlined in this lesson can be used to model any simple Satellite missions using Python.
Resources
-STK 12.8 or newer
-STK Python API
-Python Capable Code Editor (ex-PyCharm Community Edition)
-STK-Python API Integration Knowledge Article
Adding the Satellite
After allowing our script access to STK, we can add in the Satellite:
satellite = root.CurrentScenario.Children.New(AgESTKObjectType.eSatellite, 'ClimateWatch')
root.ExecuteCommand(r'VO */Satellite/ClimateWatch Model File "C:\Program Files\AGI\STK 12\STKData\VO\Models\Space\aqua.mdl"')
The root.ExecuteCommand line allows us to run an STK Connect Command straight in Python. This connect command allows us to change our Satellite into the Aqua model from the STK Database.
After that we will set the Classical Orbital elements:
keplerian = satellite.Propagator.InitialState.Representation.ConvertTo(AgEOrbitStateType.eOrbitStateClassical)keplerian.SizeShapeType = AgEClassicalSizeShape.eSizeShapeAltitude
keplerian.LocationType = AgEClassicalLocation.eLocationTrueAnomaly
keplerian.Orientation.AscNodeType = AgEOrientationAscNode.eAscNodeLAN
Next, we need to define each of these in order to fully define our orbit and then assign them to our satellite:
keplerian.SizeShape.PerigeeAltitude = 5000  # kilometers
 keplerian.SizeShape.ApogeeAltitude = 9000  # kilometers
 keplerian.Orientation.Inclination = 98.5  # deg
 keplerian.Orientation.ArgOfPerigee = 0  # deg
 keplerian.Orientation.AscNode.Value = 90  # deg
 keplerian.Location.Value = 180  # deg
satellite.Propagator.InitialState.Representation.Assign(keplerian)
We can then propagate the satellite
satellite.Propagator.Propagate()
We can also edit the Display Data using Python to give us specifics about our Satellite's Classical Orbital elements.
To do this we must run the following code:
satellite.VO.DataDisplay.RemoveAll()
datadisplay = satellite.VO.DataDisplay.Add('Classical Orbit Elements')
datadisplay.FontSize = AgEVOFontSize.eMedium
datadisplay.TitleText = 'ClimateWatch Classical Elements'
datadisplay.IsShowNameEnabled = False
datadisplay.IsVisible = True
Adding the Sensor
To visualize what a satellite’s instruments may be able to view, we can add a sensor and define it:
sensor = satellite.Children.New(AgESTKObjectType.eSensor, 'Monitor')
 sensor.CommonTasks.SetPatternRectangular(5,5)
In later tutorials, we can use this alongside built-in STK tools to compute access over a given area.
Next Steps
With a running instance of STK, you can run this code from your preferred Python code editor to propagate a new Satellite. You can copy the code to increase the number of Satellites or change the Keplerian elements to model a different orbit. You can also adjust the field of view of the sensor, or change the type. With code like this, it is possible to much more rapidly change parameters based on the mission. To see more tutorials on STK Python Integration, please visit STK : LSAS Tec (freshdesk.com)
If you have any further questions or need assistance, we are here to help! Our dedicated Tec-Support team is ready to provide prompt and personalized assistance tailored to your needs. Please don't hesitate to reach out by submitting a ticket by going to https://lsas-tec.freshdesk.com/support/tickets/new. We look forward to assisting you and ensuring a positive experience.
Thanks,
LSAS Tec-Support Team
Was this article helpful?
That’s Great!
Thank you for your feedback
Sorry! We couldn't be helpful
Thank you for your feedback
Feedback sent
We appreciate your effort and will try to fix the article