
STK-Modeling Comets and Asteroids Using NASA Ephemeris Data
In this tutorial, we will create specific Ephemeris Data for the Comet Nishimura which passed through our solar system in the Fall of 2023. We will use NASA’s Horizon tool to generate specific Ephemeris Data for this comet and Implement that Data into STK. There are several tools and external links required to replicate the example Scenario. Importing a Custom .obj model is not required to view the STK functions demonstrated in this tutorial, so these steps will be optional.
Resources
- Solutions: LSAS Tec (freshdesk.com)
- Newly Discovered Green Comet Is Passing By Earth This Week | Smithsonian (smithsonianmag.com)
- Horizons System (nasa.gov)
- -Knowledge: Downloading and Using Ephemerides for Comets, Asteroids, Small Bodies, and Interplanetary Spacecraft (site.com)
- Download — blender.org(Optional)
- Asteroid 3d Model(Optional)
Building the Ephemeris Data
We are going to build a Custom .txt file using NASA’s Horizon System Planner. To do this we must first set the correct parameters.
Go to Horizons System (nasa.gov) to access the Horizon’s Web Application.
First set the 1 Ephemeris type to Vector Table.
Set the 2 Target Body: to the official name of the Comet, enter “C/2023 E1 (ATLAS)”.
Set the 3 Coordinate Center: to be geodetic by using method ‘Specifying Coordinates’.
Set the 4 Time Specifications: to be start time of 2023-09-01 and the stop time of 2023-10-1 with a step of 6 hours.
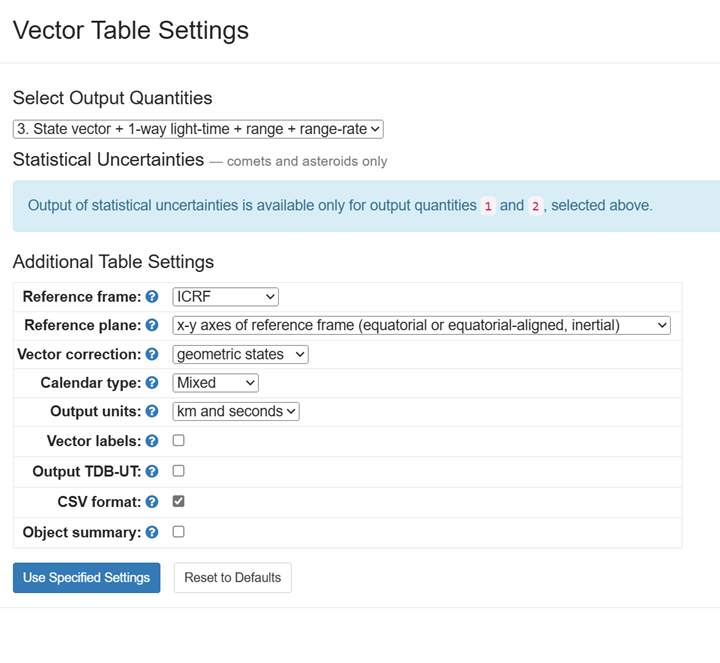
Set the 5 Table Settings: by clicking [Edit] to configure the Vector Table Settings. Ensure that your settings are the same as the ones pictured below:
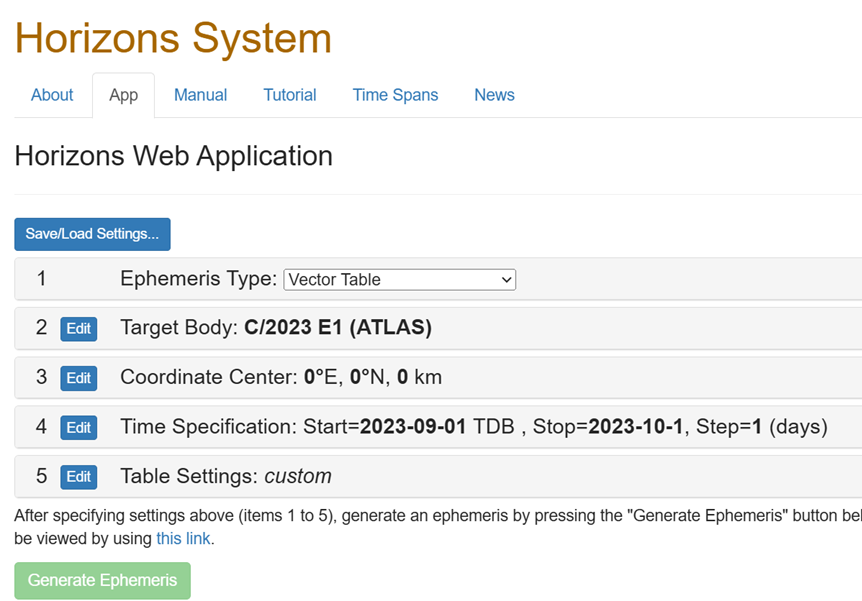
Once you complete these steps, your Ephemeris Data settings should look like this:
Click [Generate Ephemeris] Data and save it to an easily accessible location. Now we will begin to implement this data into STK to view Comet Nishimura’s Path.
Note: You can press Save/Load Settings, to save the settings for reuse.
Integrating with STK
You will need the STK JPLHorizonsEphmeris.ZIP file from the AGI Website. It can be found at the bottom of this page: Knowledge: Downloading and Using Ephemerides for Comets, Asteroids, Small Bodies, and Interplanetary Spacecraft (site.com)
After you have downloaded and unzipped it, bring the .xml file into the STK Plugins Folder. This is the default directory for it: C:/Program Files/AGI/STK 12/Plugins
Next, we will open Command Prompt or a Windows PowerShell as an Administrator.
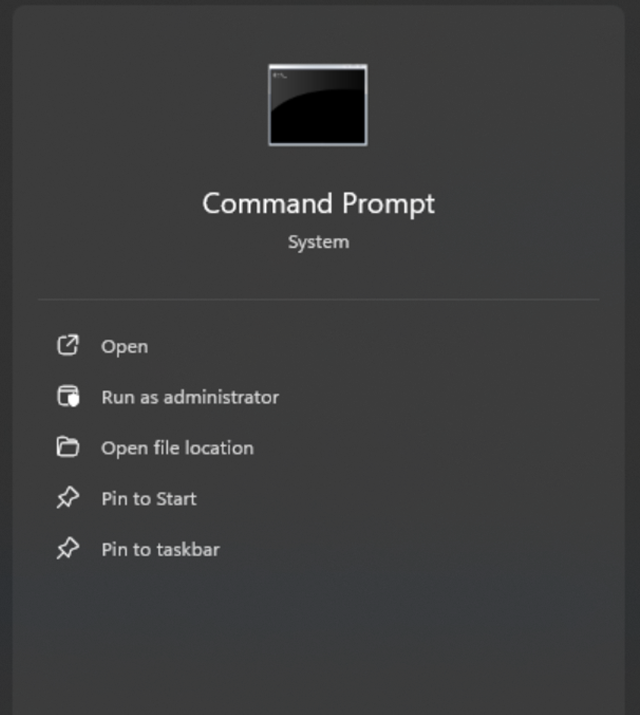
We will run the following command (replace the Install Location with the proper one correct to your download):
regsvr32 InstallLocation JPLHorizonsFileReader.wsc
Configuring the Scenario
Create a new STK Scenario within the period specified while creating the Ephemeris Data. For this example, use 1 Sept 2023 until 1 Oct 2023.
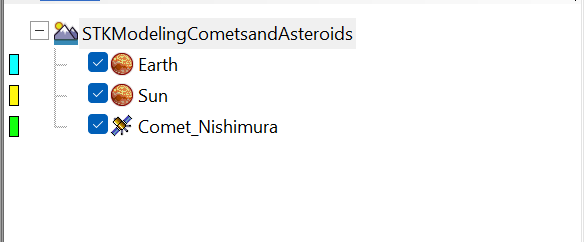
Then use the Insert STK Objects tool to add two Central Bodies and a Satellite.
Within the Properties->Basic->Definitions Tab on the Central Bodies set one of them to the Earth and the Other to the Sun. Ensure Auto Rename is checked:
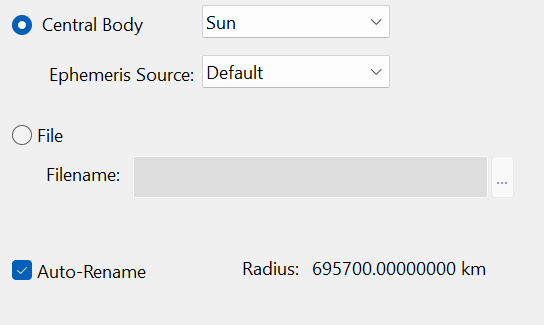
Click [OK] to save your changes.
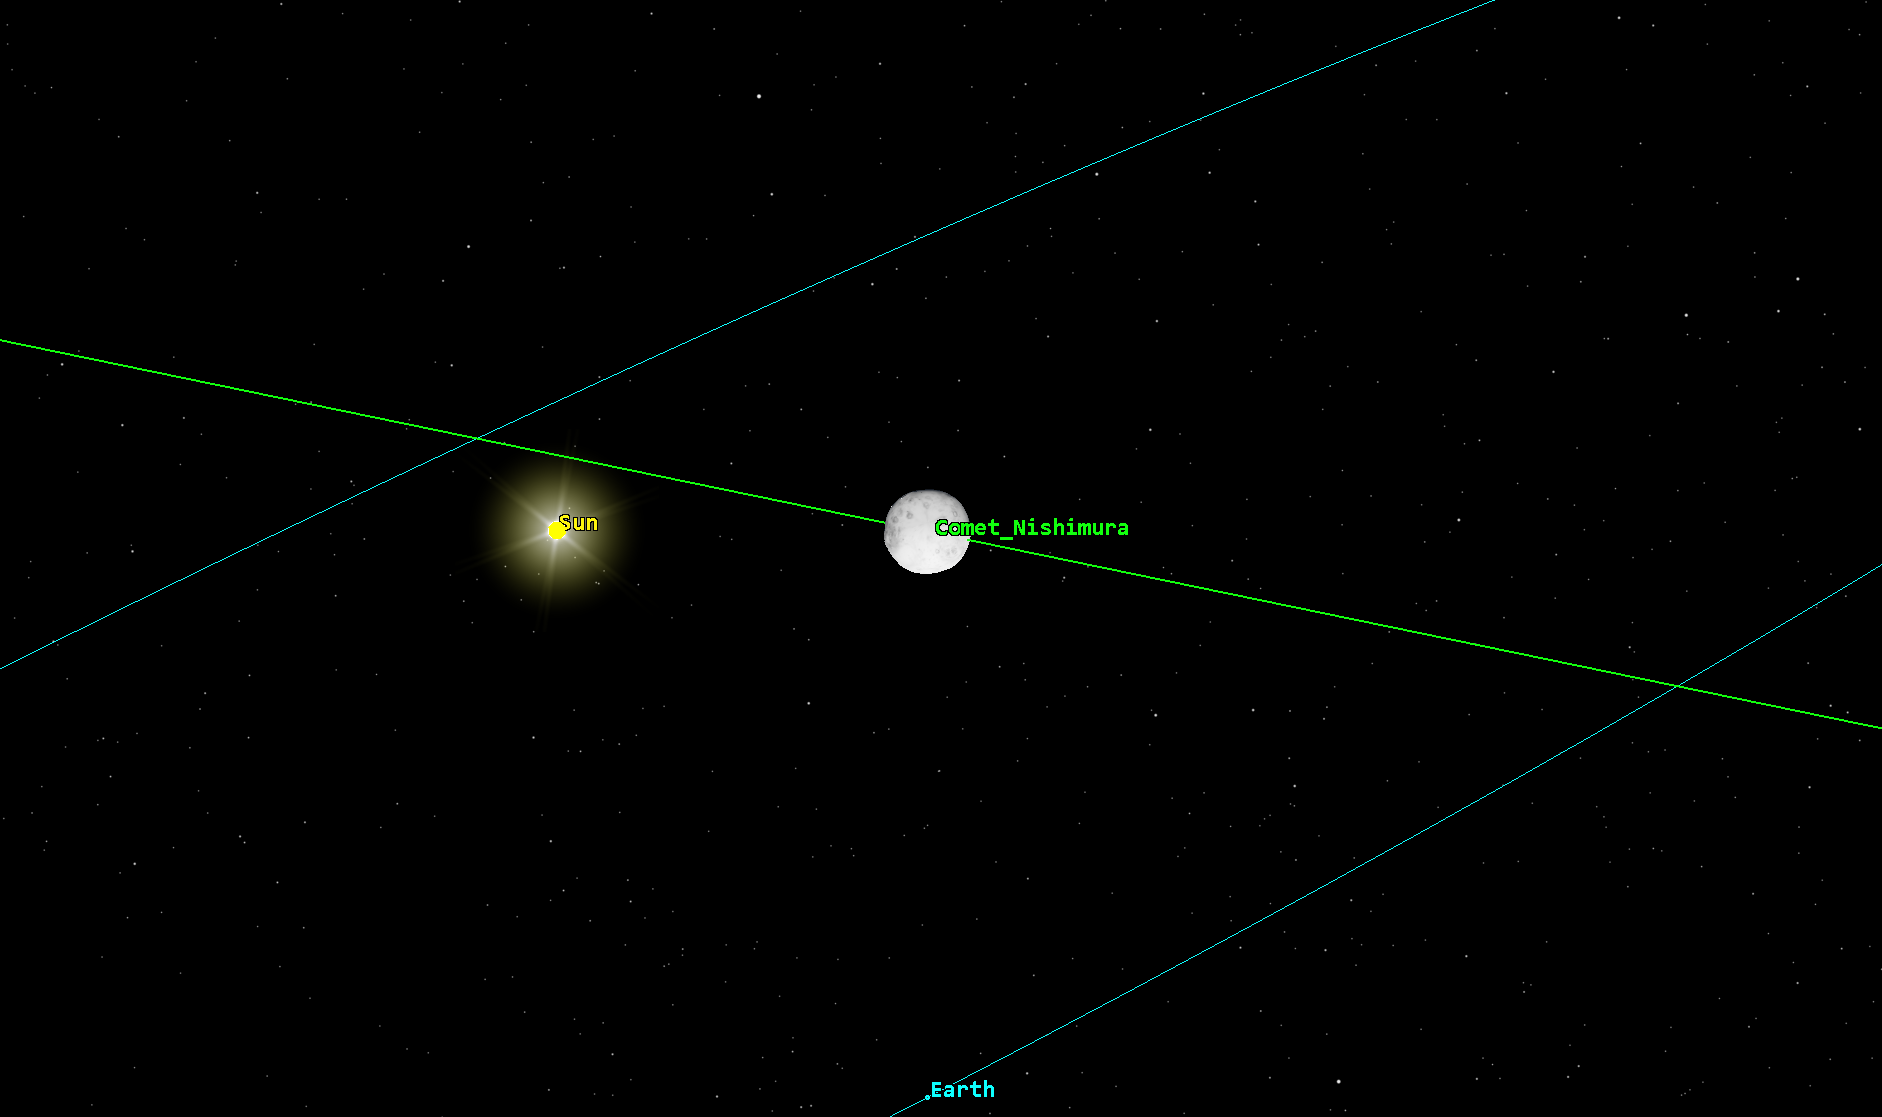
After Renaming the Satellite to Comet_Nishimura, it should look like this:
Open the Properties->Basic->Orbit page for Comet Nishimura
Change the Propagator to STK External. Then change the Ephemeris Type to JPL Horizons Ephemeris Reader. Next, select the file you generate from NASA’s Horizon tool earlier. It should look like the following:
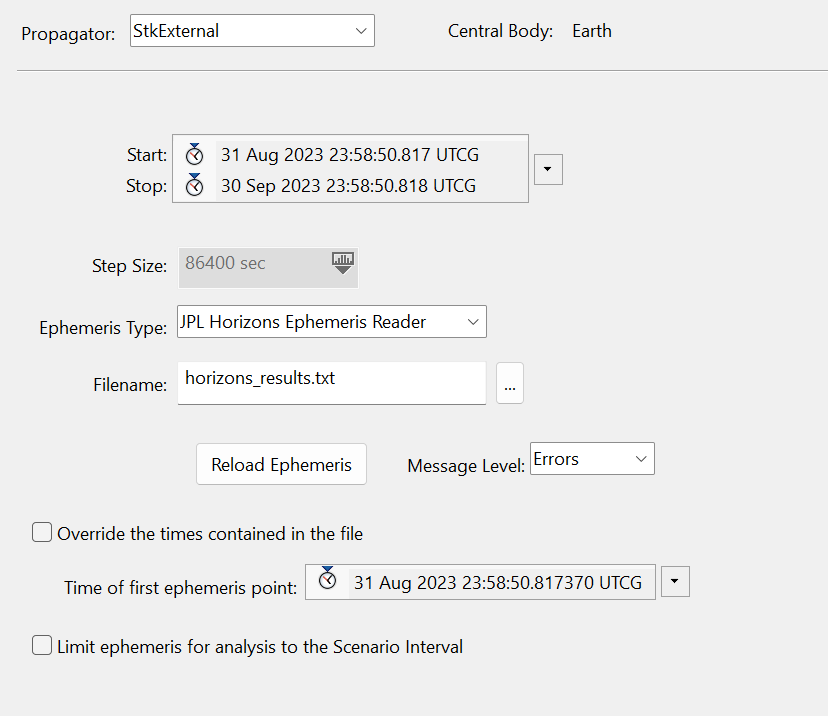
Click OK to save your changes and close the Satellite Properties.
Configuring the Window
Maximize the 3D Graphics Window and Open the Globe Manager:

Disable the Moon in the 3D Graphics Window to declutter the Scenario:
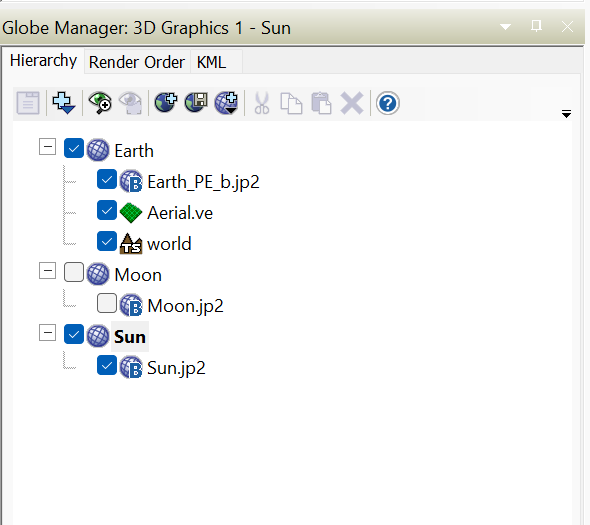
After that, configure the Settings for the Central Body Objects.
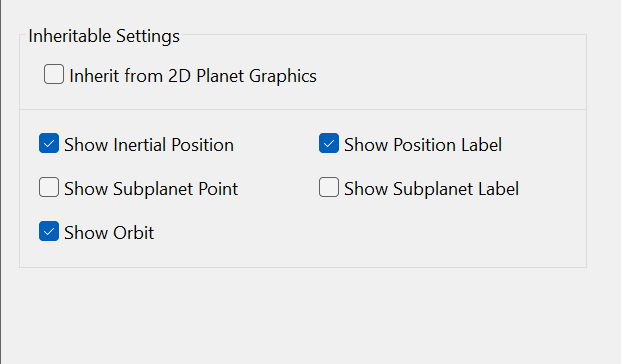
In each, go to Properties-> 3D Graphics-> Attributes and ensure only the following are selected:
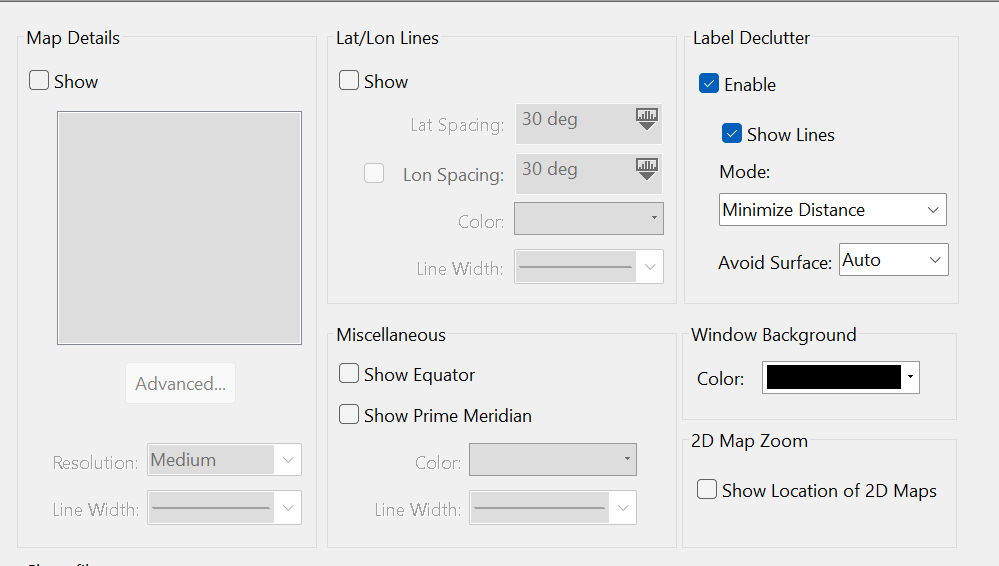
Click OK to save your changes. After that open, the 3D Graphics Window Properties->Details and enable Label Declutter:
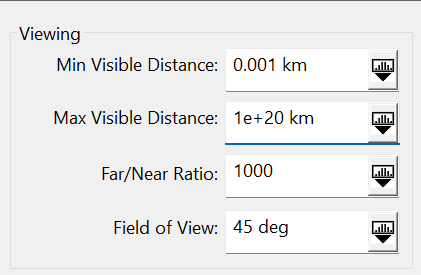
Then, in the 3D Graphics Window Properties-> Advanced Section, turn the max viewing distance up to 1e^20km:
Click [OK] to save your changes.
Now Configure your window by clicking on Comet Nishimura and selecting Zoom-to. Then you can start your scenario to see its Path in the given Ephemeris.
You now have a Satellite Object that has used NASA’s Ephemeris Data to represent the path of a Comet that passed through our Solar System. You can stop there, or if you want to you can continue to the optional steps to change the Satellites model.
Changing the Object Model (Optional)
The “Comet Nishimura” has the default Satellite object model in the 3D Graphics View, which is not ideal for 3D graphics window when zoomed in.
An example celestial object model that you can use, is one from Sketchfab, located here: Asteroid 3d Model.
Note: This is not Comet Nishimura but an example 3D model of a celestial object.
Additionally, when downloading 3D Models, they might not be in the correct format for STK to ingest. The Asteroid model is available as an *.OBJ model. We will need to convert the .obj file to a file STK recognizes. The easiest way to do this is with Blender, a free 3D modeling software, which can be downloaded for Windows here: Download — blender.org
Once you have downloaded and unzipped the model you wish to use, and installed Blender, you can begin to modify your .obj file into a .glb file that STK can use.
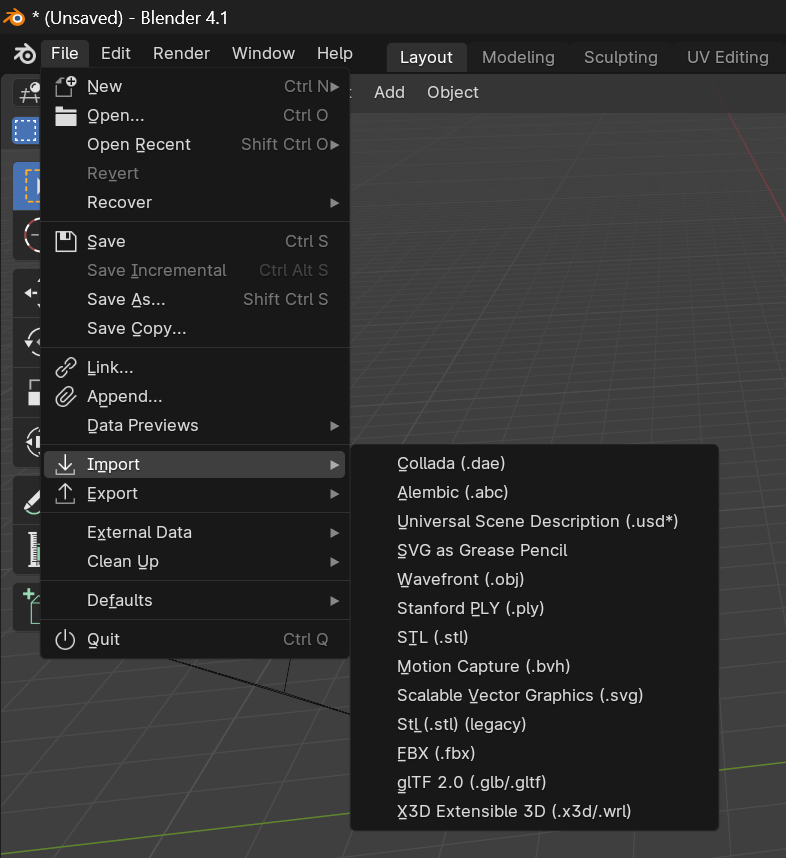
Open a new Blender Scenario and Import your wavefront .obj file:
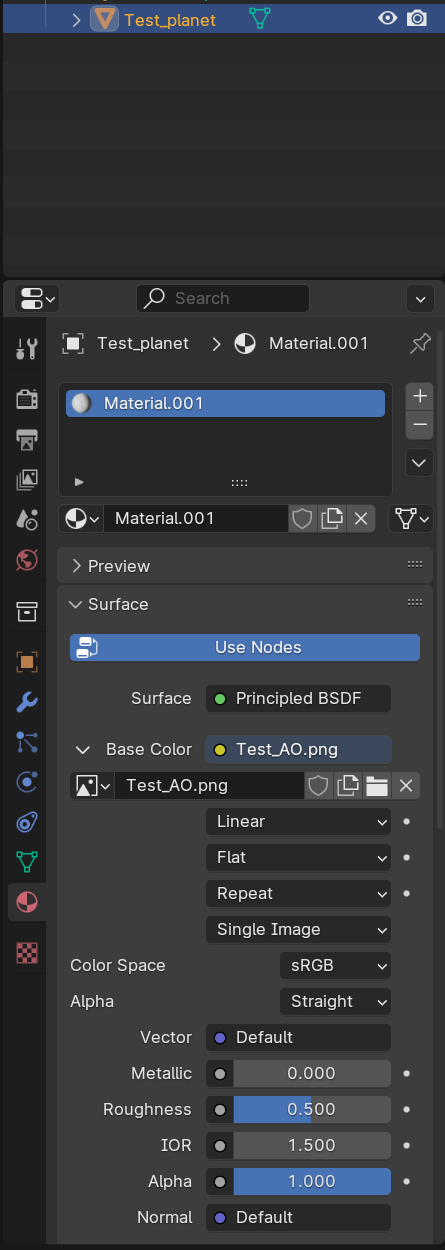
Then we will add the necessary textures to the Object. Select the Test_planet on the right side of the Blender Window and select the Materials Window.
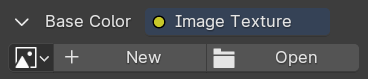
Then select the yellow dot and select the Image Texture option:
Next, select the Open option and CTRL-click all the options provided in the download of the Asteroid object from Sketchfab:

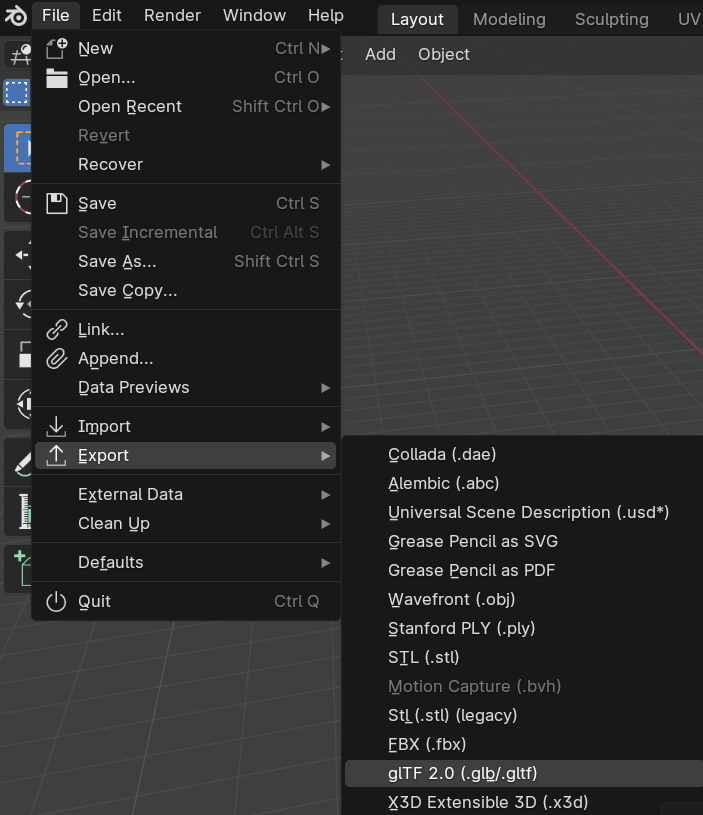
Then export your model for use in STK as a .glb file:
Return to your STK Scenario and Select Comet Nishimura Properties -> 3D Graphics ->Model and change the model to the custom one we compiled in Blender:
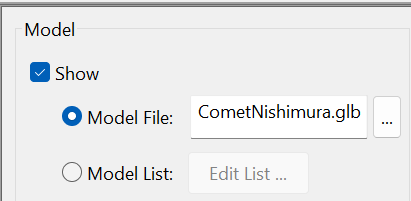
Click [OK] to save your changes.
Now select the 3D Graphics window and Zoom-to your Comet Nishimura:

Next Steps
Now you are ready to use NASA’s Horizon tool to generate Ephemeris data and implement that data into an STK Scenario to show accurate paths of Comets and Asteroids in our solar system. These can be used for a variety of applications and purposes to gather data or simply figure out when to look outside to observe the next celestial object’s close approach.
If you have any further questions or need assistance, we are here to help! Our dedicated Tec-Support team is ready to provide prompt and personalized assistance tailored to your needs. Please don't hesitate to reach out by submitting a ticket by going to https://lsas-tec.freshdesk.com/support/tickets/new. We look forward to assisting you and ensuring a positive experience.
Thanks,
LSAS Tec-Support Team
Was this article helpful?
That’s Great!
Thank you for your feedback
Sorry! We couldn't be helpful
Thank you for your feedback
Feedback sent
We appreciate your effort and will try to fix the article