STK (Systems Tool Kit) and Cesium are powerful tools. This guide explains how to export data from STK to Cesium, focusing on exporting CZML files and exporting coverage data as Georeferenced Imagery.

Exporting CZML from STK to Cesium using CZML Exporter Plugin
- Utilize the CZML Exporter plugin in STK to generate CZML files.
- Create your STK scenario with all objects and sensors.
- In the Tool Bar, Right Click and find the CZML Exporter.
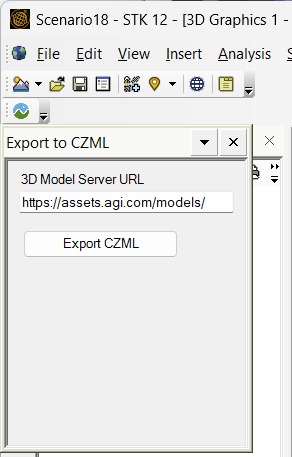
- In this One-button toolbar, Open the CZML Exporter.

- In the CZML Exporter plugin to export the scenario to a CZML file.
- Note:This plugin captures the following objects.
- 3D Models, including vehicle attitude and STK model articulations
- Access lines
- Chains
- Covariance ellipsoids (excluding curvilinear ellipsoids)
- Text label for each object
- Routes / Trajectories / Orbits (in the default reference frame)
- Routes over terrain for ground vehicles
- Note: Default 3D Models are available from AGI can be used.
- https://help.agi.com/stk/12.8.2/index.htm#czmlExport.htm
- Upload to Cesium Ion:
- Go to https://ion.cesium.com/
- Login or Create an Account (Free for starting users)
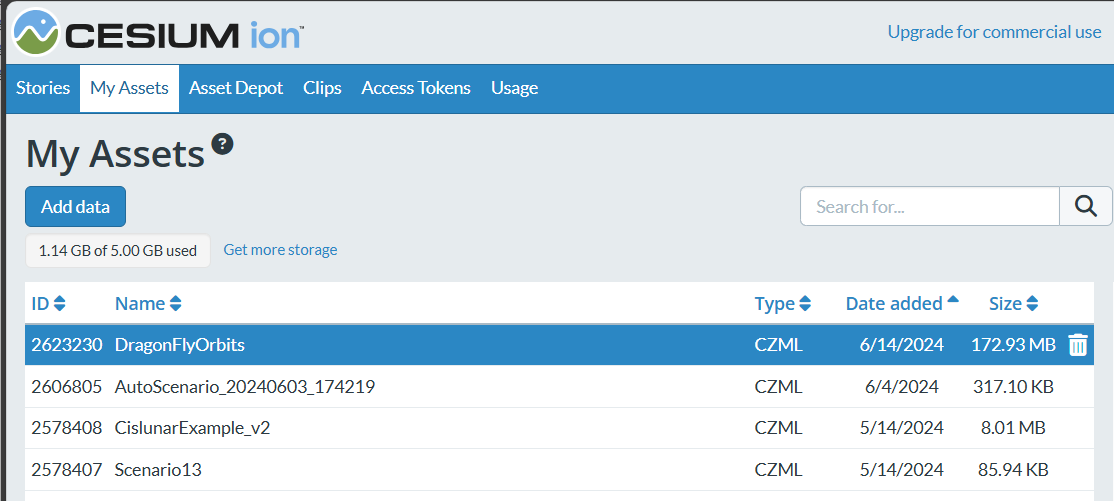
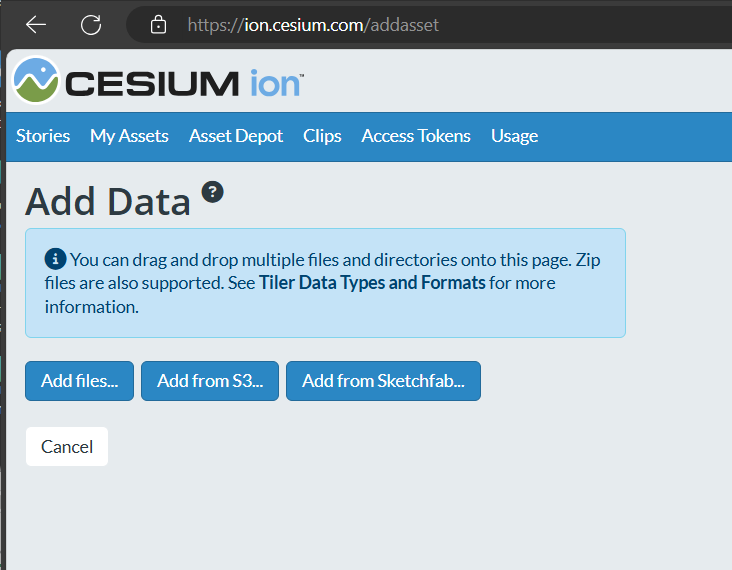
- Click My Assets, then click [Add Data] then in the Add Data page. Select [Add files…]
- Create CZML Stories:
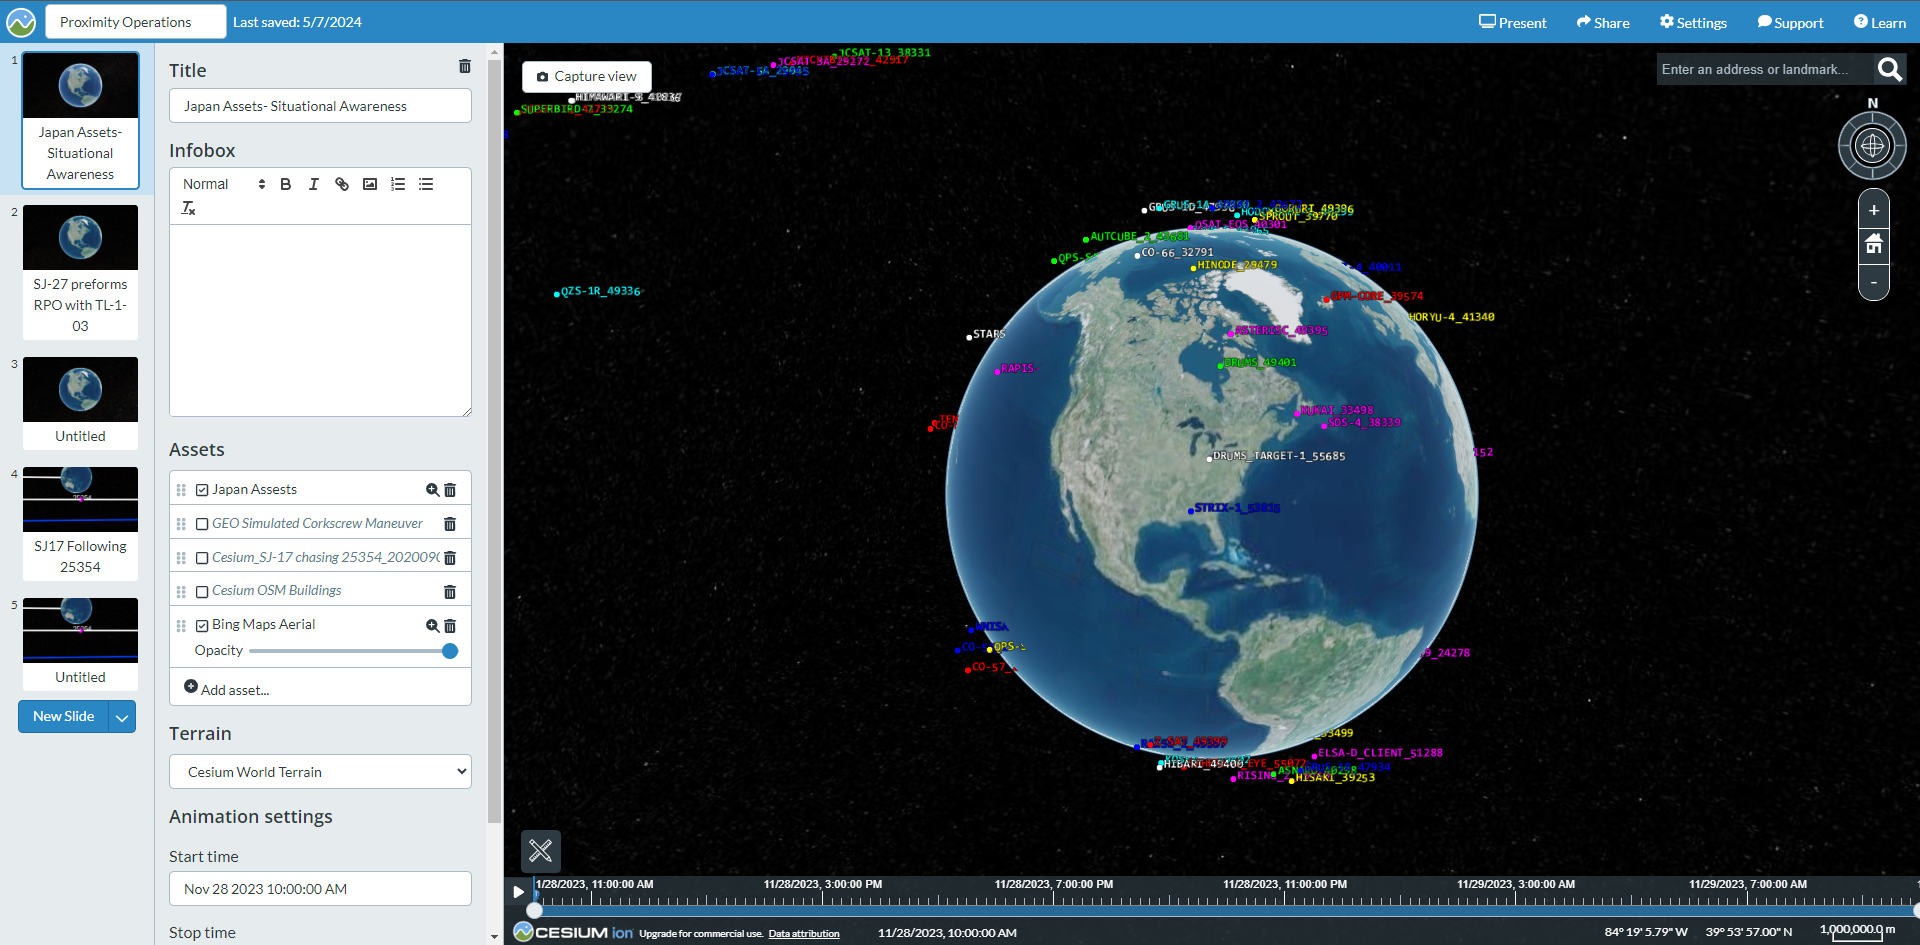
- Use the Asset: In Cesium Stories, add the uploaded CZML asset.
- Setup the Story:
- Configure the time scale and view.
- Add text for different vignettes of your scenario.
- Share Your Story: Utilize the share feature to share your stories with external users.
- Note:
- CZML includes the position and velocity of all physical objects in your scenario.
- It includes sensor projections for all objects.
- Non-physical analysis objects are not included.
- Save reports and graphs as images separately for any additional analysis information.
Other Export Capabilities: Coverage to JP2
- Export Coverage Definitions as JP2:
- Georeferenced Imagery Files: These files can be loaded into Cesium Ion natively.
- Connect Command: Use a connect command to export Coverage Definitions as JP2.
- Types of Contours:
- Block Contours: Use this if your STK scenario uses block contours.
- Smooth Contours: Interpolates rough blocks into smooth contours.
- Steps:
- Use the relevant connect command for your desired export:
- [Export Block Contours](https://help.agi.com/stk/../Subsystems/connectCmds/Content/cmd_GraphicsExportBlockContours.htm)
- [Export Smooth Contours](https://help.agi.com/stk/Subsystems/connectCmds/connectCmds.htmcmd_GraphicsExportSmoothContours.htm)
Automating CZML Export
- Connect Command for Automation:
- Use the `ExportCZML` connect command to automate CZML exports from STK.
- Example Command:
- ExportCZML "C:/MyTemp/MyScenarioForCzml/MyScenarioForCzml.czml" http://assets.agi.com/models/
- Reference:
- [ExportCZML Command](https://help.agi.com/stk/Subsystems/connectCmds/connectCmds.htmcmd_ExportCZML.htm)
By following these steps, you can efficiently export and visualize your STK scenarios in Cesium, enhancing your storytelling and data presentation capabilities.
Was this article helpful?
That’s Great!
Thank you for your feedback
Sorry! We couldn't be helpful
Thank you for your feedback
Feedback sent
We appreciate your effort and will try to fix the article